Archive
This post is archived and may contain outdated information. It has been set to 'noindex' and should stop showing up in search results.
This post is archived and may contain outdated information. It has been set to 'noindex' and should stop showing up in search results.
How to Make a Cheap Photo Studio and Improve Your Sales on eBay
Apr 10, 2015Web and InternetComments (1)
When selling your items on eBay, whether used or new, it is a great idea to build a photo studio to take your pictures. It will improve the chances of your items selling, reduce questions, and you may even be able to get a little higher price for them.
If you don't have a tripod yet, I recommend getting something inexpensive like the AmazonBasics 60-inch tripod (check compatibility with your camera). A tripod is important to a good photo, regardless of the photo studio you have.
The camera itself doesn't need to be expensive. The tripod is what makes it possible to take great product photos. You will do fine with any good sub-$100 camera, like this Nikon Coolpix.
Once you have a tripod, the key to a great photo is setting the ISO down very low, manually adjusting the camera's white balance, and using the camera's timer to take the picture (so it's 100% steady when it takes the shot).
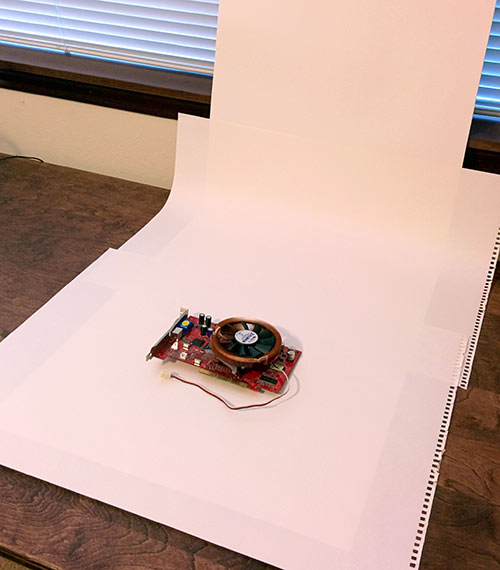
The least-expensive and quickest photo studio is comprised of a simple white backing. Perhaps you have a large drawing book from a college art class or something similar. It can be converted to a simple photo studio backing in a matter of seconds:
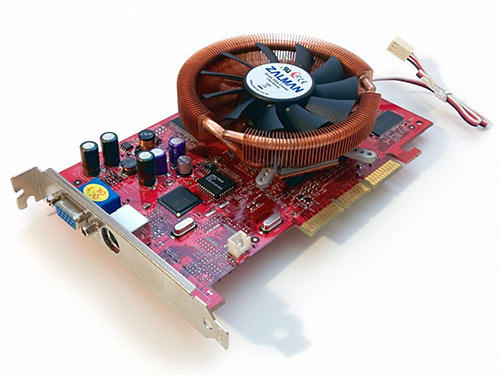
While your lighting may not be ideal, you can still get some very good product photos with a little time spent in a photo editing program adjusting brightness and contrast:
The above was taken with a simple desk lamp used as lighting in a dimly-lit room.
The biggest problem with the above photo is the shadow left by the harsh desk lamp light. Let's get the lighting and shadows under control with some additional light sources.
A much better photo booth consists of side-lighting that is diffused through white paper or cloth. This makes the shadows less prominent, and light will be more even.
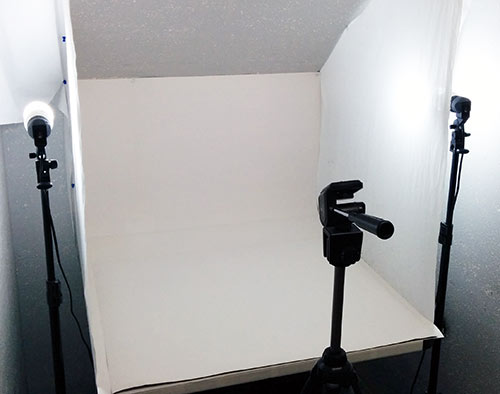
You can make a "photo box" out of a cardboard box that has its sides partially cut out and replaced with white paper. I went a different route with a table and white cloths draped from the ceiling. This allows for larger products to be photographed:
This studio requires some light stands, which run about $50-60 for a complete kit. I recommend the LimoStudio Kit as it comes with everything, including the bulbs.
With the photo booth above I can take very high-quality product photos like these (view high-resolution):

Those are exhaust manifolds for a marine engine. The full kit weighs about 122 lbs, which would be too unwieldy for a cardboard box photo booth. I use replaceable white paper sheets for the base, since they tend to get dirty over time and are easy to replace.
With any photo booth you'll have to spend some time in a photo editing program adjusting the brightness and contrast. There are free options like gimp, and you may even be able to use your operating system's built-in photo editor.
To get 100% pure white backgrounds you may need to use the color selection feature of your photo program (in Photoshop it is under Select > Color Range) to select colors close to white.
Having a Tripod
If you don't have a tripod yet, I recommend getting something inexpensive like the AmazonBasics 60-inch tripod (check compatibility with your camera). A tripod is important to a good photo, regardless of the photo studio you have.
The camera itself doesn't need to be expensive. The tripod is what makes it possible to take great product photos. You will do fine with any good sub-$100 camera, like this Nikon Coolpix.
Once you have a tripod, the key to a great photo is setting the ISO down very low, manually adjusting the camera's white balance, and using the camera's timer to take the picture (so it's 100% steady when it takes the shot).
Cheapest Photo Studio
The least-expensive and quickest photo studio is comprised of a simple white backing. Perhaps you have a large drawing book from a college art class or something similar. It can be converted to a simple photo studio backing in a matter of seconds:
While your lighting may not be ideal, you can still get some very good product photos with a little time spent in a photo editing program adjusting brightness and contrast:
The above was taken with a simple desk lamp used as lighting in a dimly-lit room.
A Better Photo Studio
The biggest problem with the above photo is the shadow left by the harsh desk lamp light. Let's get the lighting and shadows under control with some additional light sources.
A much better photo booth consists of side-lighting that is diffused through white paper or cloth. This makes the shadows less prominent, and light will be more even.
You can make a "photo box" out of a cardboard box that has its sides partially cut out and replaced with white paper. I went a different route with a table and white cloths draped from the ceiling. This allows for larger products to be photographed:
This studio requires some light stands, which run about $50-60 for a complete kit. I recommend the LimoStudio Kit as it comes with everything, including the bulbs.
With the photo booth above I can take very high-quality product photos like these (view high-resolution):
Those are exhaust manifolds for a marine engine. The full kit weighs about 122 lbs, which would be too unwieldy for a cardboard box photo booth. I use replaceable white paper sheets for the base, since they tend to get dirty over time and are easy to replace.
Photo Editing
With any photo booth you'll have to spend some time in a photo editing program adjusting the brightness and contrast. There are free options like gimp, and you may even be able to use your operating system's built-in photo editor.
To get 100% pure white backgrounds you may need to use the color selection feature of your photo program (in Photoshop it is under Select > Color Range) to select colors close to white.
Good advice. Thank you!