Archive
This post is archived and may contain outdated information. It has been set to 'noindex' and should stop showing up in search results.
This post is archived and may contain outdated information. It has been set to 'noindex' and should stop showing up in search results.
How to Build a Budget or Office PC (Guide With Pictures)
Jan 28, 2011Computer HardwareComments (0)
View the updated guide here!
There are many reasons to build your own PC instead of buying a Dell, HP, or other pre-assembled PC. The most common reasons are that it's fun, it gives you a sense of accomplishment and confidence, it gives you more control over what goes into your PC, and it usually costs less.
Let's first take a look at the components that typically go into a PC (plus some common abbreviations for them). Note that this list does not include the monitor, keyboard, mouse, or other external hardware, just the PC box itself.
There are additional things you can purchase, such as a sound card, wireless card, additional hard drives, etc. These won't be covered in this guide.
The first step is to decide what you want to use your PC for. Will you be surfing the Internet and checking emails? Will you be playing the latest PC games? Will you be doing photo or movie editing? A gaming PC will need better components than an Internet PC will, and will cost more.
The most expensive single part of a PC is usually a discrete graphics card. Discrete means separate or detached, and a discrete graphics card is a separate board that is connected to the motherboard. You can forgo buying a graphics card altogether and just select a motherboard with integrated graphics. It is much less expensive, however the graphics processing ability of an integrated GPU is far less, and will only be suitable for web-based and older games, or light photo editing. For an Internet/Email only PC, integrated graphics will be ok.
This is the part that discourages most newcomers, as there is a plethora of different standards that you will have to mix and match. Stick with it, and you will eventually understand it and have a leg up on all your friends. I will break down each component and give the most common standards used as well as my preference.
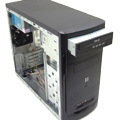
Computer case
The most common sizes of cases are "Full Tower", "Mid Tower", "Mini Tower", and "Desktop". Full towers are very tall and usually used for workstations and servers. Mid towers are the most common for home PCs and is what I recommend. Mini towers are smaller and come in many different shapes. Desktops are designed to sit flat on a desk.
Beyond the case size and shape, there are specifications that determine what motherboard and power supply a case will accept. The two main types are "ATX" and "Micro-ATX" (there are others but I recommend staying away from them while you're learning). Micro-ATX is smaller than ATX, and both are very popular. For simplicity I recommend building your first PC in an ATX case. This is because micro-ATX cases sometimes take ATX power supplies, and it can cause problems when ordering the right parts if you aren't on top of it.
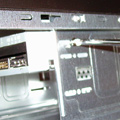
Cases generally have USB, Fire-wire, and Audio ports somewhere on or near the front. These are useful, so make sure the case has them in the location you desire. They will be plugged into the motherboard, which I will cover later. Just FYI, the ports on the back of the PC are a part of the motherboard, not the case.
One other thing to consider is that a lot of PC cases come with a power supply. It can be a good way to save a few bucks by buying a case with a PSU already in it, just make sure you get a more expensive case as the cheap power supplies that come in cheap cases can cause instability or damage other components.
Power supply
ATX and Micro-ATX are the two main options here as I mentioned above. Power supplies are the most important component of the PC, as a low quality one can damage your components. Just make sure to stay away from $15-20~ cheap ones, as those are generally low quality. When purchasing a case with PSU or a separate PSU, be sure to read the reviews (depending on where you buy) and if one has too many negative reviews stay away from it. When buying a power supply separate from a case, make sure they are compatible. ATX12V is the latest standard for ATX cases as of this writing.
Motherboard
You've learned about ATX and micro-ATX, which refers to the mounting hole pattern and size of the motherboard. If you're getting an ATX case, you'll need an ATX motherboard. Next make sure the motherboard CPU socket matches the CPU that you want. After that, make sure the motherboard chipset has the features you want. Examining the side of the motherboard that has all the external connectors helps.
Some motherboards will have integrated graphics and others won't. If you're planning to get a discrete GPU, make sure it has a socket that matches your GPU (PCI Express is the most common at the time of this writing). As far as system memory goes, make sure the supported memory (DDR, DDR2, DDR3, DDR4, etc) matches the stick(s) of memory you intend to get.
Processor
The main things to look at in a processor are the number of cores (single-core, dual-core, quad-core, etc) and the CPU speed (measured in MHz, GHz, or THz). Retail CPU's almost always come with a heat sink and fan (HSF). Unless you are buying a high performance heat sink for better cooling, stick with the stock heat sink.
Memory
As mentioned above, make sure you get memory that your motherboard supports. If your motherboard supports dual-channel or tri-channel memory, get a matching memory kit to take advantage of the additional performance.
Hard drive
Hard drives use various interfaces, so make sure your motherboard has the correct connections (PATA, SATA, etc). At the time of this writing, SATA 3.0 is the most common, and SATA 6.0 is up and coming.
Optical drive
You'll generally want a DVD burner, as they are dirt cheap and can read and write both CDs and DVDs. If you want to read or write Bluray discs, you can get a Bluray ROM or burner instead. Just remember that a ROM drive can only read, while a burner can read and write.
Graphics card
This can be the single most expensive part of the PC. If you have decided you need a discrete graphics card, then you have a large range of choices to make. Discrete graphics cards range from $30 up to $700 and higher. Figuring out how much graphics power you need can be difficult, and I can only give a very rough guide here since the market changes constantly as new cards are released several times per year. If you do a bit of movie editing or graphics editing, a $50~ card should be fine. If you want to play the latest games but aren't worried about maxing out settings, a $150-200~ card should be fine. If you want to max the latest games, a $300-400 card should do fine. As far as which graphics card to buy at each price point, I recommend browsing Tom's Hardware, Anandtech, or similar hardware sites and reading their reviews.
Now that you have an idea of what you need and what to look for, it's time to start shopping. I recommend Newegg.com since they have competitive prices, excellent customer service, and their website is very usable. Use the categories to find the parts, it may take some getting used to. Refer to this guide when selecting each component.
Now that you've decided on the parts, make sure you have the tools and a clear workspace to work with. A static wristband is a good idea for beginners, which can be purchased at any electronics store or online. The fasteners and other hardware you need (such as cables) should come with your components, as long as you've purchased "Retail" products and not "OEM" products (note: most hard drives at Newegg.com are OEM and that's ok, as the cable to connect them comes with the motherboard).
Once you've got all your new parts in, you'll want to lay them out neatly in your workspace. Before you start opening bags though, go wash your hands. It will discharge any static and clean any corrosive oils off your hands. Follow the directions that came with your anti-static wristband if you bought one of those.
 Step 1
Take your case out and remove the side panels. There are usually between 1 and 3 screws in the back for each side panel, although some use a lever. Pull any hardware or tape out of the inside of the case. Usually there is a small packet with screws/stands, a power cord, and zip ties around the wires of the power supply (if it is included).
 Step 2
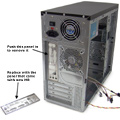
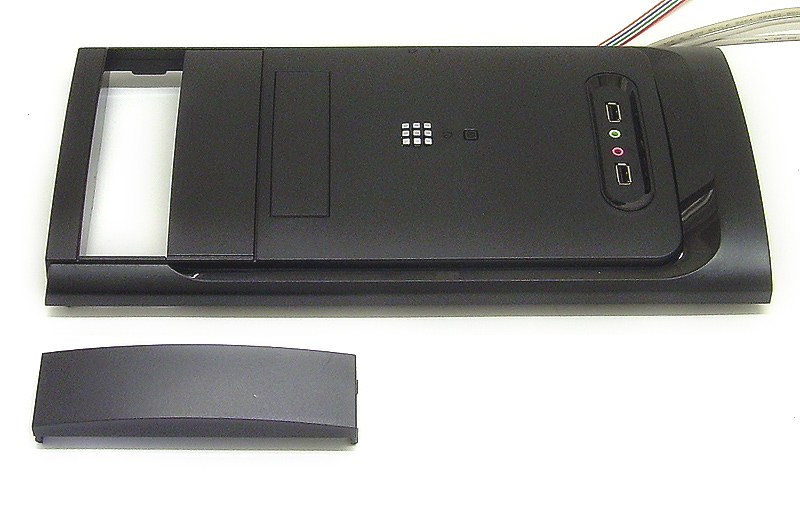
Make sure there is a slot for your optical drive that is open in the front (usually the top-most one). If there is not one open, remove the front bezel and then remove one of the 5.25inch drive bay covers. Once you have an open slot for your optical drive, put the front bezel back on.
 Step 3
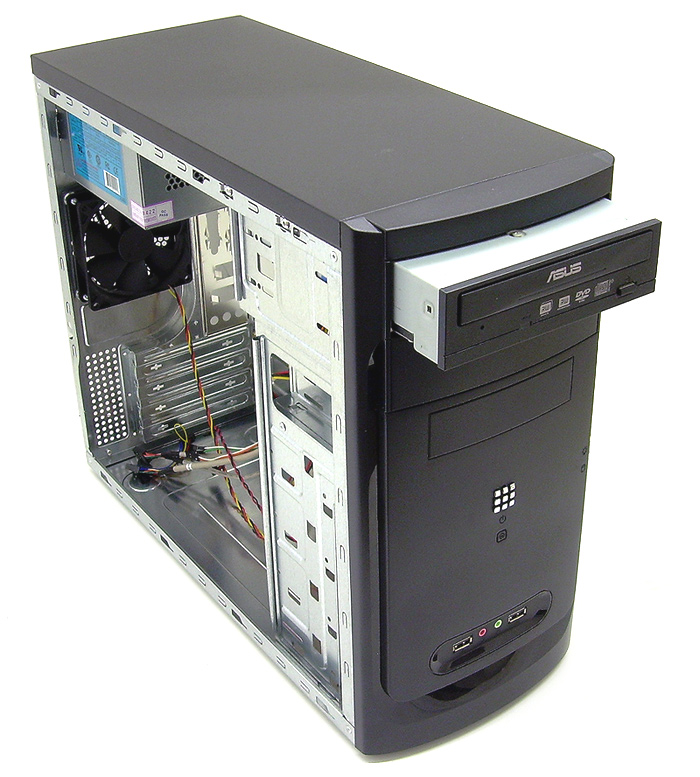
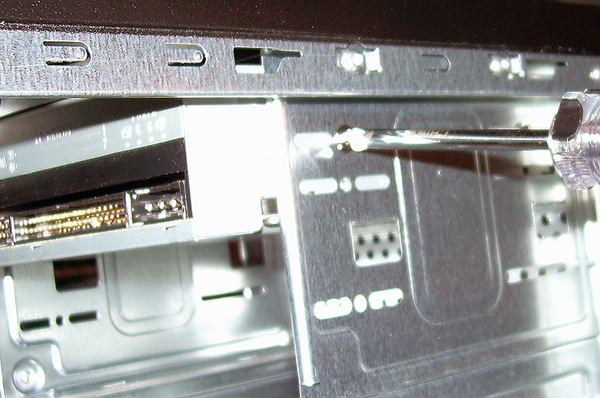
Install the optical drive by sliding it in from the front of the PC (with the bezel fully attached), then use 4 fine screws (2 on each side) to fasten it in place. Note: some cases have "tool-less" features, which are usually little plastic snaps or sliding pieces that secure the optical drive. If these are available you can use them in place of screws.
Step 4
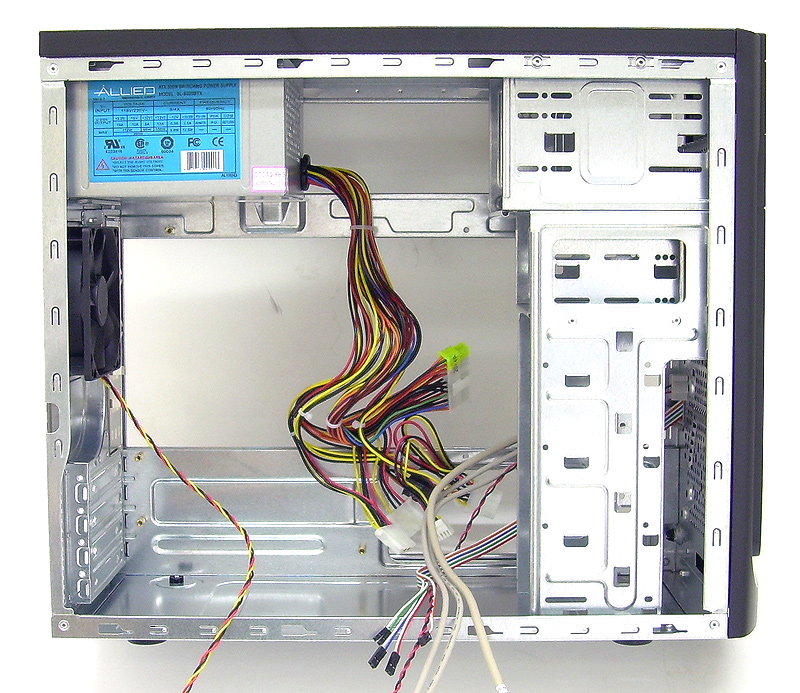
If you purchased a separate PSU, now is a good time to install the PSU. If the PSU is pre-installed, skip this step. The PSU is held on by 4 coarse screws in the back top of the PC case. These screws should come with the case or PSU. There is only one orientation that it will properly line up, so don't worry about messing it up.
 Step 5
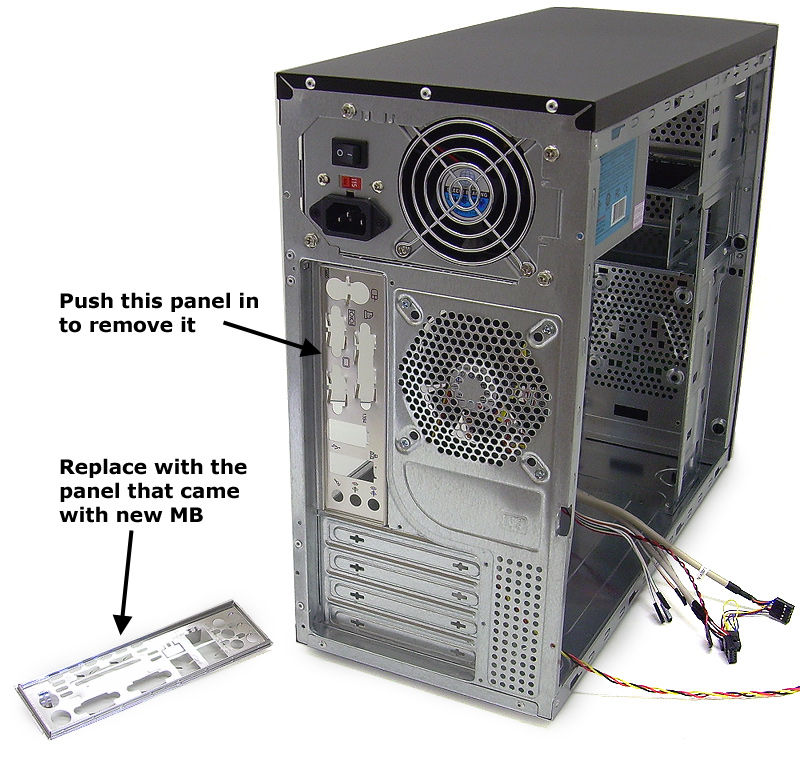
The next step is to install the motherboard. Before this is done, the rear-panel will need to be swapped out. The motherboard comes with a rear panel which you will want to use. Hold that rear panel up to your new motherboard's rear ports and poke out any additional holes from the panel that need to be poked out. Now install it into the case, making sure to remove the one that may have come with the case first. Most usually snap into place, just make sure it is fully seated.
Step 6
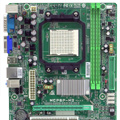
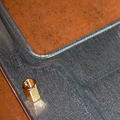
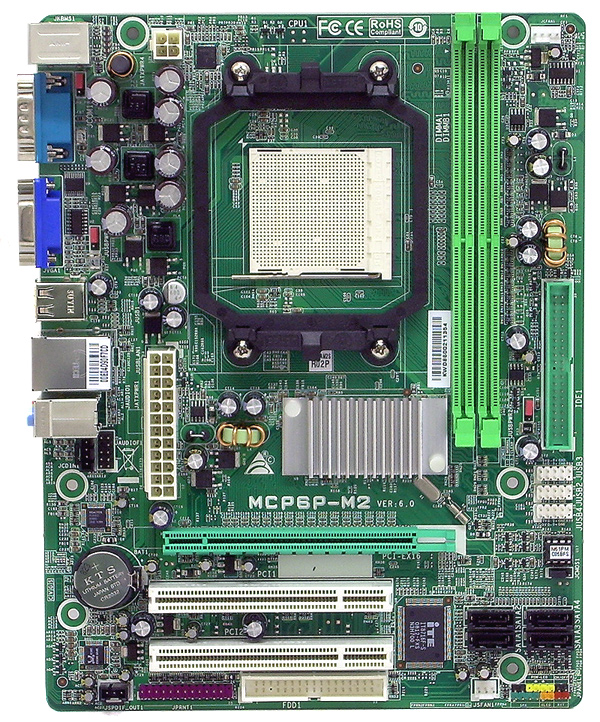
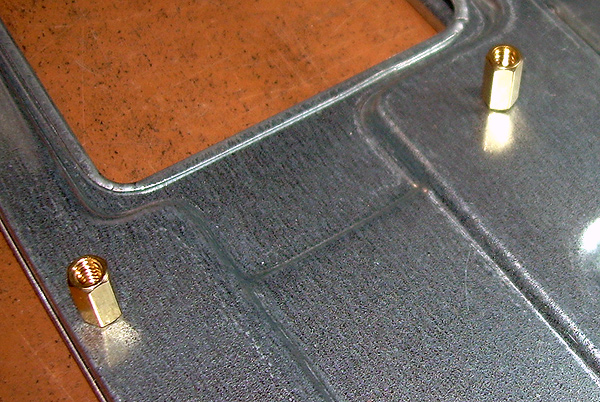
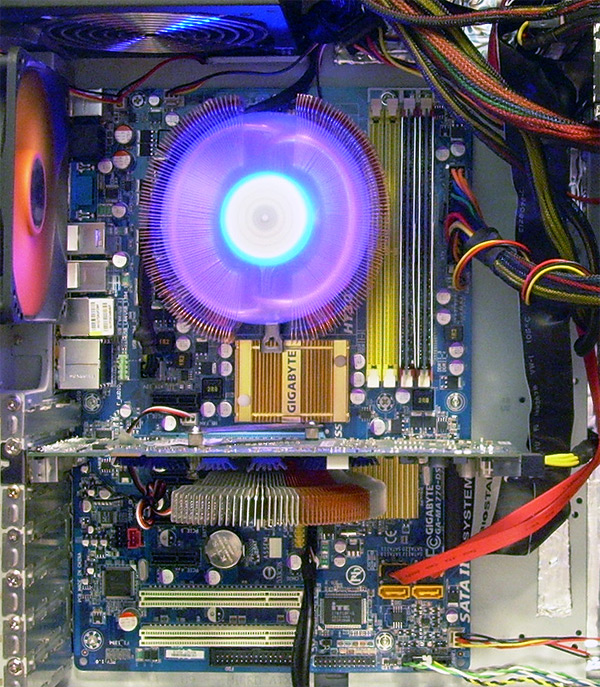
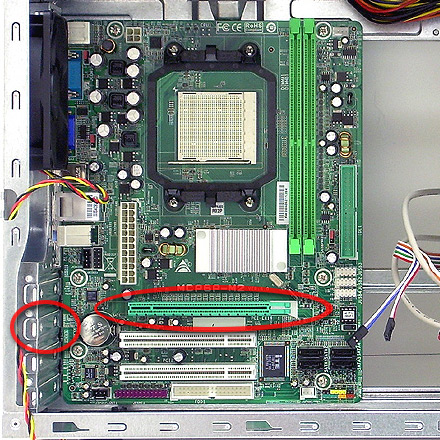
Motherboards mount with 6 or more screws. The motherboard in the first picture below (a micro-ATX motherboard I used for my office build) uses 6 screws, and you can see the designated holes as they are outlined by a white circle. The case will have corresponding holes to match these, and may need to have motherboard stands installed, which can be seen in the 2nd photo below. Some cases come with little bumps that stick out about 1/4, in which case the motherboard stands are not needed.
If the case needs motherboard stands, take the motherboard (in its plastic wrap still), set it in place, and eye-ball which holes need to have a stand installed. If you are unsure, refer to the motherboard and case manuals/paperwork. Once you have the motherboard stands installed (tighten them with pliers), or if you didn't need them, carefully remove the motherboard from its plastic wrap or foam (making sure your static wristband is on) and set it in place, then use the provided screws to tighten it down.
 Step 7
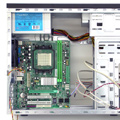
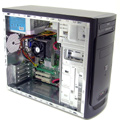
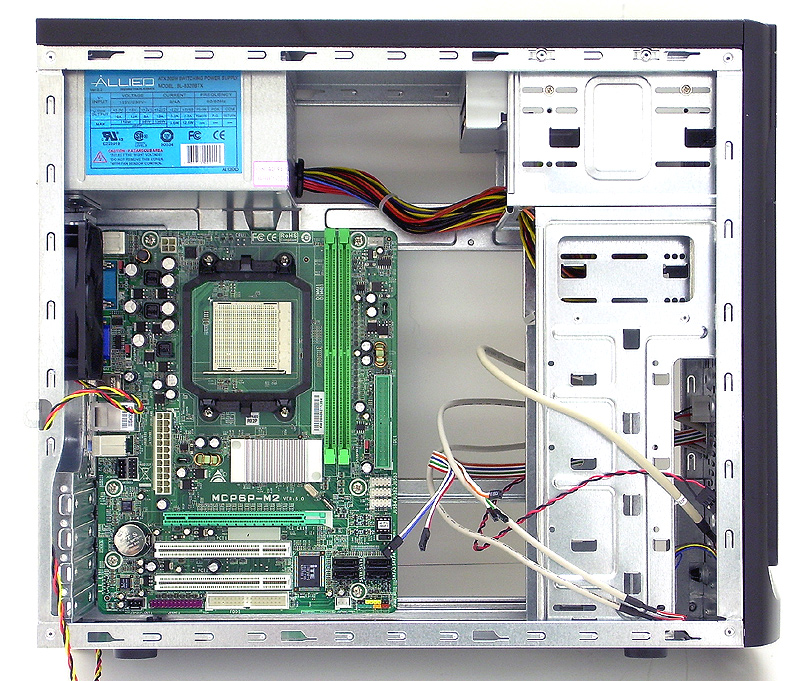
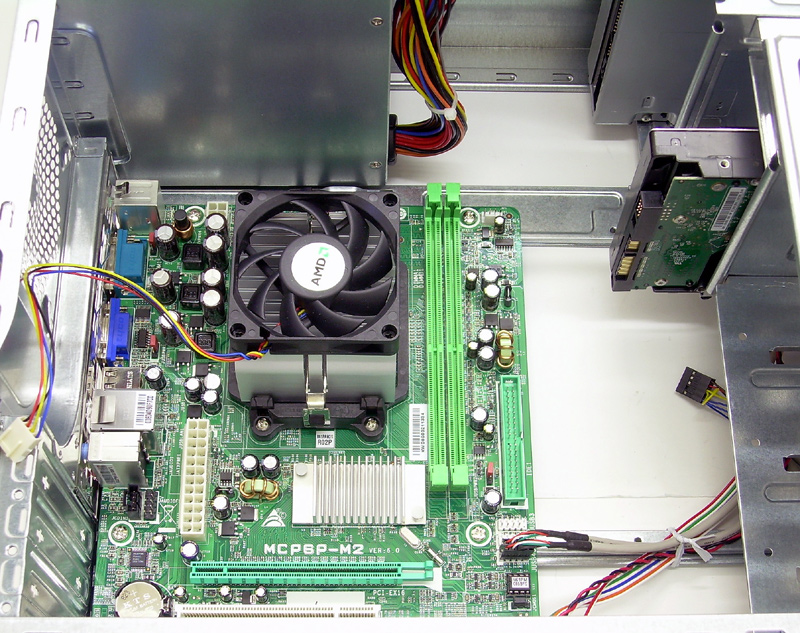
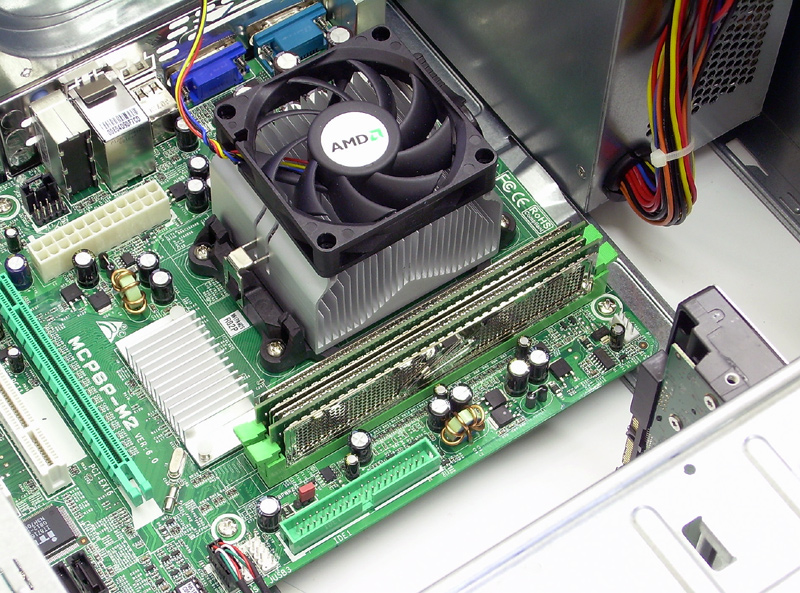
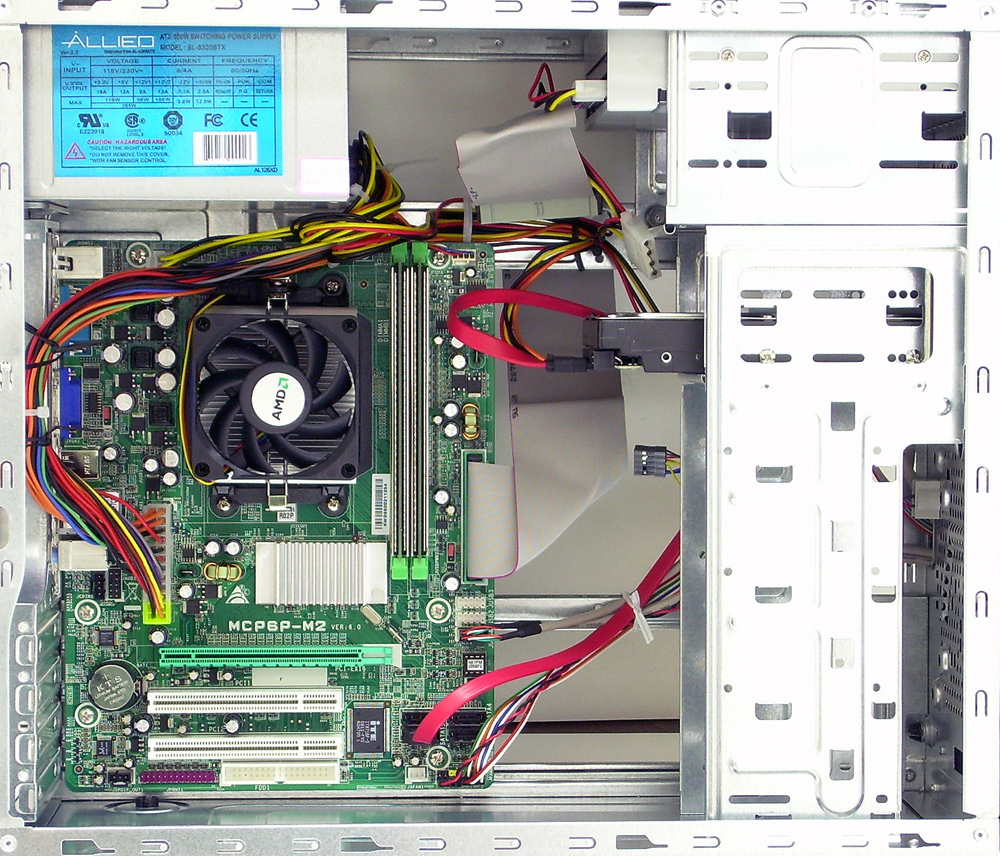
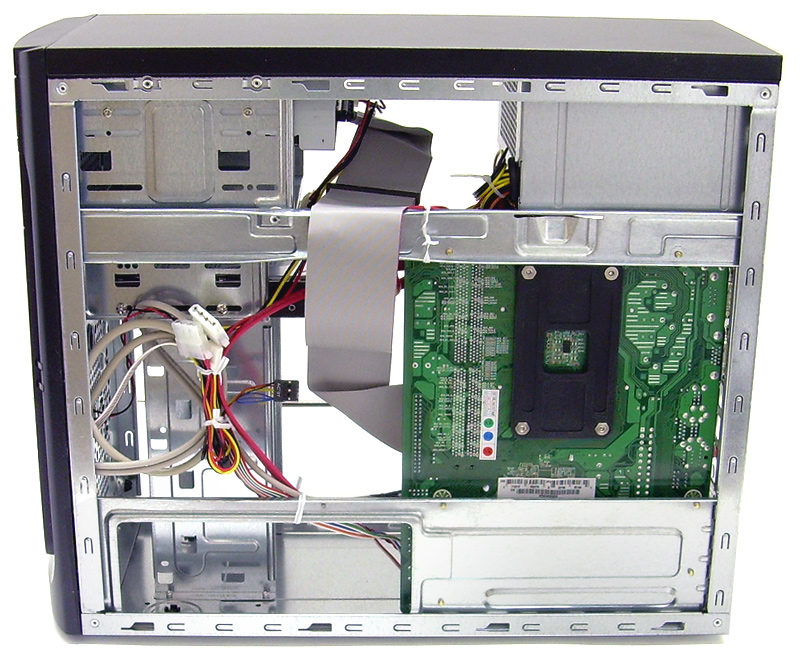
Next insert the hard drive into one of the open hard drive internal 3.5-inch bays towards the front of the case. Use 4 coarse screws to secure it in place (2 on each side). In the picture to the right, I have the hard drive installed and have also connected some motherboard headers (explained in the next step). For those that have taken notice, I did install the hard drive into one of the 3.5-inch external floppy drive bays as opposed to one of the internal hard drive bays. This was mostly a preference for this build to keep the wires uncluttered. Note: some cases have "tool-less" features, which are usually little plastic snaps or sliding pieces that secure the hard drive. If these are available you can use them in place of screws.
One other thing to note in the picture is that I removed the rear exhaust fan. For this build, the extra fan is not needed as this computer will generate very little heat (integrated graphics and 45W CPU). I recommend keeping the exhaust fan (if the case came with one) unless you know it won't be needed.
 Step 8.
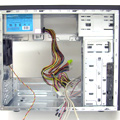
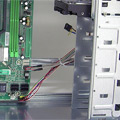
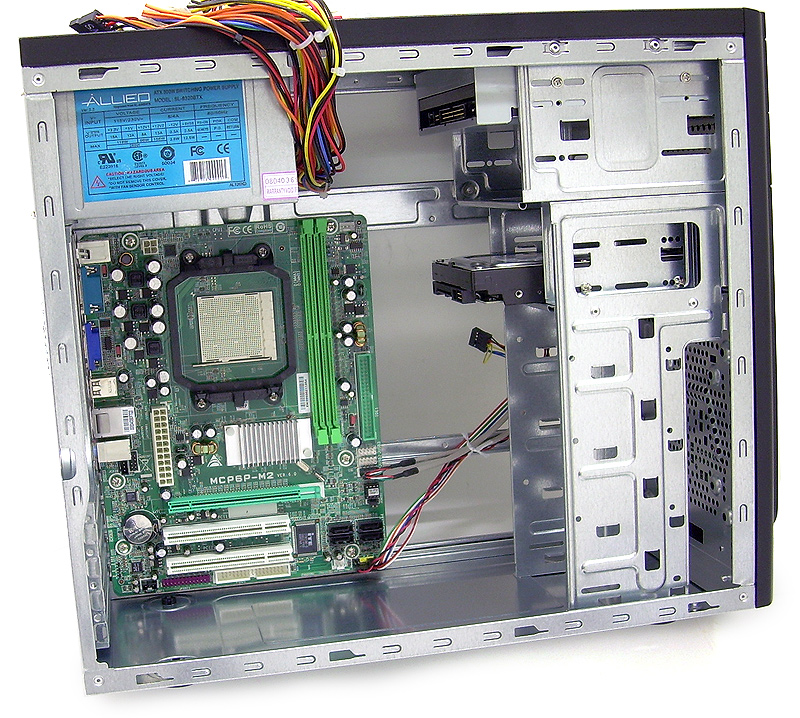
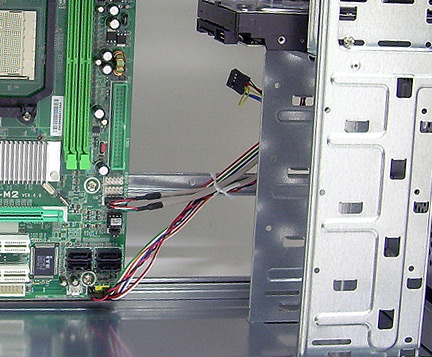
Now while things are still easy to access you may want to connect the front bezel buttons, USB, Fire-wire ports, audio ports, and speaker. All those wires that were dangling from the front bezel need to get plugged into the proper motherboard ports. Refer to your motherboard manual for help on where they plug in. The plugs are usually labeled for USB, Fire-wire (IEEE-1394), Audio, Power SW (Power Button), Reset SW (Reset Button), HD LED (hard drive activity LED), P LED (computer on LED), and Speaker (makes the beep during boot up). Their exact names vary by case, but are usually self-explanatory.
In the picture to the right you will see I have plugged in the front panel buttons and one USB front panel port. I chose not to connect the front audio connectors as it isn't needed on this build. And there is no Fire-wire support with this motherboard.
It is a good idea to keep wires neat as you build the computer, so I have wire-tied any slack in the wires and tied them out of the way.
Step 9
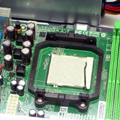
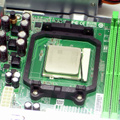
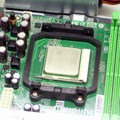
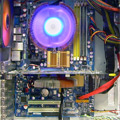
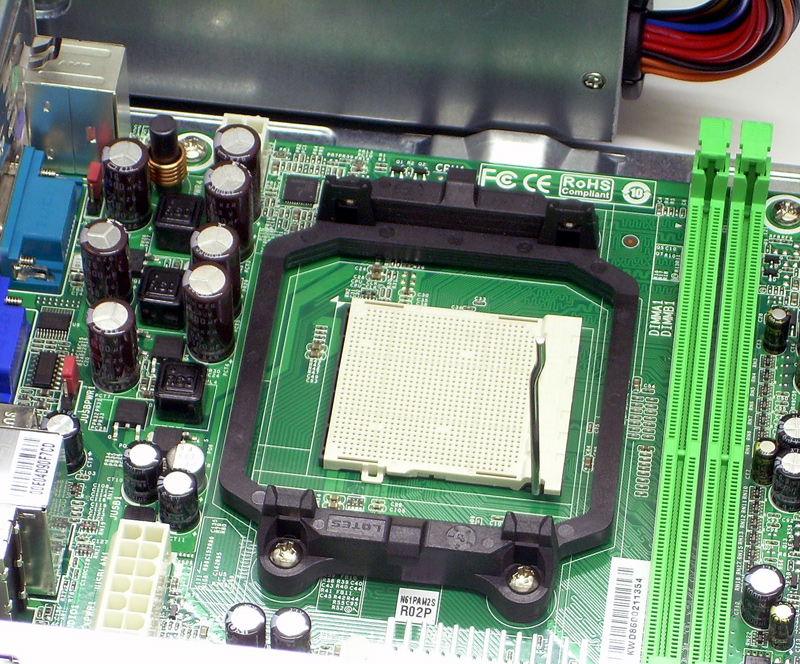
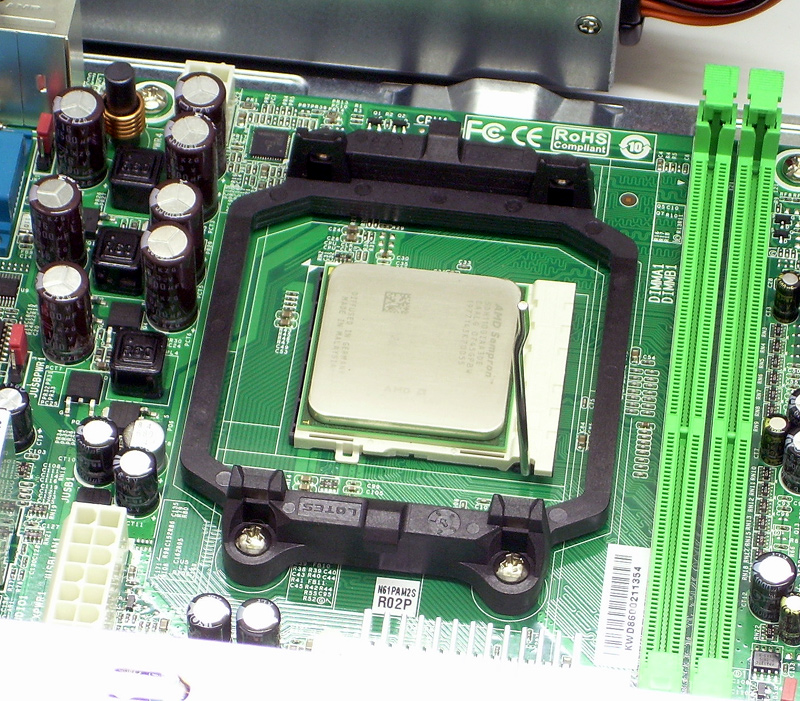
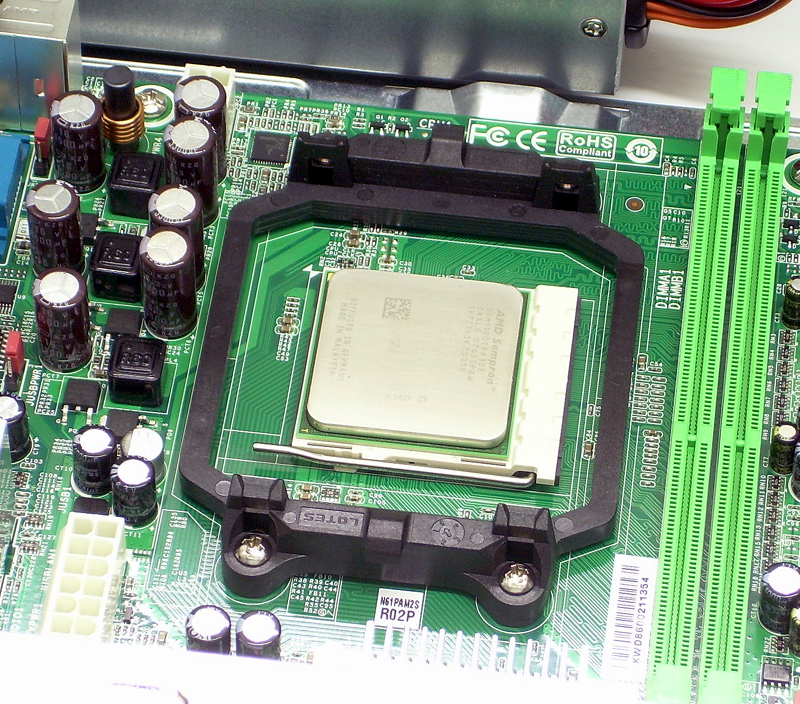
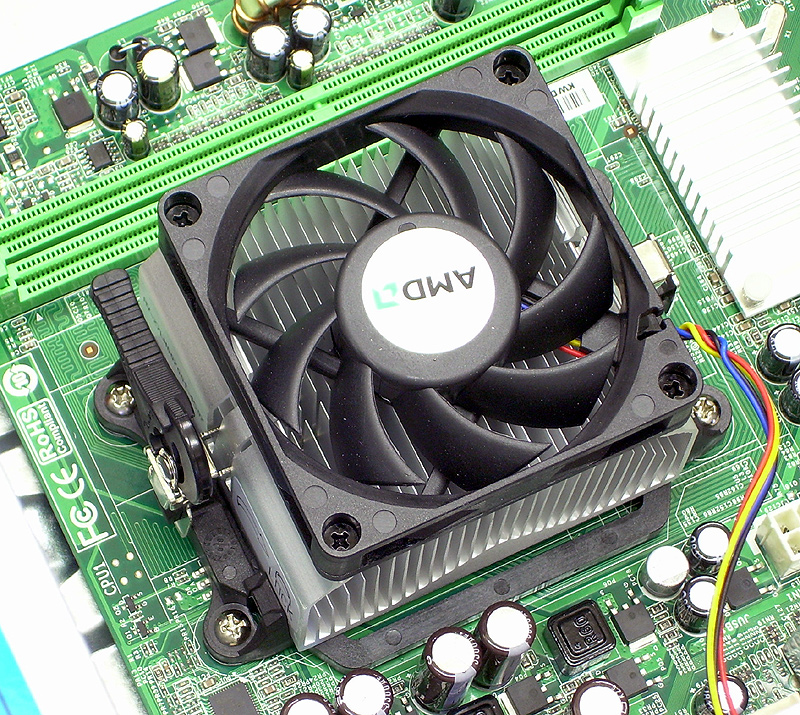
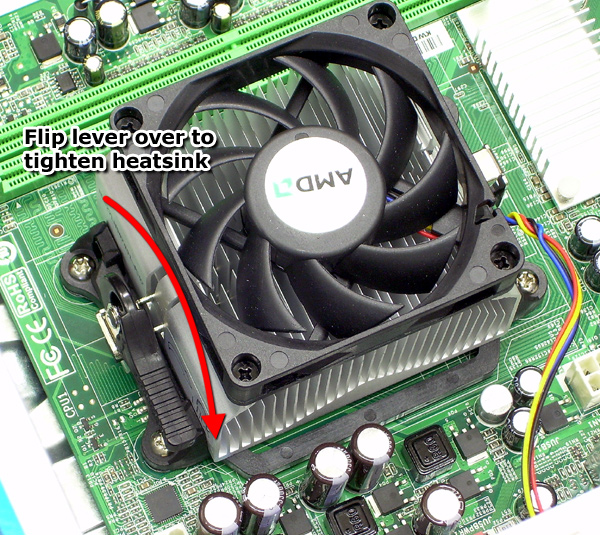
Now install the CPU. Follow the directions that come with the CPU, as the installation procedure will vary by make and model. There will be a specific orientation that the CPU fits into the socket, so be sure to follow the directions closely. And don't forget to plug in the fan power connector, if the heat sink has a fan.
I have provided pictures of a socket AM2 AMD Sempron install, which uses a lever on the socket and a lever on the heat sink. This may or may not be similar to your motherboard and cpu. One thing to check on all CPU installations is that there is thermal compound on the bottom of the heat sink (the part that contacts the top of the CPU). There should be a patch of compound on all retail heat sinks that come with CPUs; however, in the event there is no compound, you will want to apply some before installing (buy it from Radio Shack or an electronics store).
 Step 10
Now install the memory. Follow the motherboard manual's guide for which slots to install them into. If you purchased a multi-channel kit (dual, tri, etc), make sure you use the right slots. There will be two tabs at each end of each memory slot. Snap them back and insert the memory module (making sure the "cut-out" on the module is aligned properly) and press firmly until the two tabs lock into place. If the ram module doesn't go into place, make sure you aren't attempting to put it in upside-down.
In the picture to the right, I have installed two 1GB memory modules (a dual-channel 2GB kit). They came with shiny chrome heat spreaders. There were only two slots available so there was no guessing as to which slots to put them in. Many motherboards have 3 or 4 memory slots though, which is why you should consult the manual on which ports to use depending on how many modules you have.
 Step 11
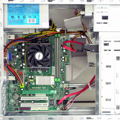
If you purchased a discrete graphics card, install it now. Consult the guide to determine what slot to use (PCI Express, etc). Be sure to open up the rear expansion slot cover so the graphics card can fit. In the second picture to the right, I have highlighted in the red the PCI Express X16 slot and also the back panel that needs to be removed. The 1st picture shows a PC with a discrete GPU installed, and a custom heat sink. Once the GPU is in place, use a coarse screw to secure it. Note: some cases have "tool-less" features, which are usually little plastic snaps or sliding pieces that secure the graphics card. If these are available you can use them in place of screws.
On the second picture to the right, you will also see that the motherboard has 4 memory slots, and I have modules installed in the two right ones. On this MB model, it specified to have them either in both right slots or both left slots, to activate dual-channel. Some motherboards have a different configuration.
Step 12
Now it's time to plug everything else in. Plug in the 24-pin motherboard power cable from your PSU into the large motherboard power port, and then the 4 or 8-pin CPU power cable into the motherboard as well. Plug in your optical and hard drive(s) using the proper plug (SATA power cable plugs are long, very flat, and black, and the cables themselves are very small - IDE/PATA power cable plugs are larger with 4 distinct plugs, and the cable is very wide and flat). If you have a discrete graphics card that requires a 6 or 8-pin (or sometimes more) power plug, be sure to plug it in. Plug in all your fans. If the fan has a very small 2, 3, or 4 pin connector, plug it into a free power plug on your motherboard (if available), or use a molex adapter to plug it into the PSU. If they use the larger molex 4-pin connectors only, connect those to your power supply. In this build, I didn't have any other case fans so that wasn't an issue.
You're almost done, if you plugged everything in right, you can move on to the software installation. You may have extra cables and hardware left over, don't worry as that is normal. There is a lot you will not need. I recommend being very neat about routing your wires, in case you need to change anything later.

Before you even have the operating system installed, you can test the system to make sure it is working and detecting all of the hardware. Plug the monitor and keyboard in and the power cables, and start it up. Tap the Delete key repeatedly until you are presented with the blue BIOS screen. In the blue BIOS screen you should be able to navigate and find where it shows what hard drives and optical drives are connected. You will likely also be able to detect the system temperatures if the BIOS supports it.
If you pressed the power button and absolutely nothing happened, make sure the switch on the back of the power supply is on "I" and not "O" (which would be off). Then double check to make sure the power cables are connected. If it does not beep and you cannot get into the BIOS, or it beeps twice or has a long beep, you need to go into the Troubleshooting section of your motherboard manual, and see what it says for the beep error code. Usually long beeps are the result of RAM that is faulty or set to a speed that it cannot run at, but that is not always the case. No beeps could mean a bad motherboard, or possible CPU. But again, the beep codes are different for every motherboard so follow the troubleshooting guide in the manual.
Now it's time to install the operating system, drivers, and other software. That will not be covered in this guide, I recommend Tweakguides tweaking companion to help you with that task; just download the PDF guide and scroll down to the "Installing Windows" menu item and click it.
There are many reasons to build your own PC instead of buying a Dell, HP, or other pre-assembled PC. The most common reasons are that it's fun, it gives you a sense of accomplishment and confidence, it gives you more control over what goes into your PC, and it usually costs less.
What parts do you need?
Let's first take a look at the components that typically go into a PC (plus some common abbreviations for them). Note that this list does not include the monitor, keyboard, mouse, or other external hardware, just the PC box itself.
- Computer case
- Power supply (PSU)
- Motherboard (Mainboard, MB)
- Processor (CPU)
- Memory (RAM)
- Hard drive (Hard disc drive, HDD)
- Optical drive (CD/DVD/Bluray reader/burner)
- Graphics card (GPU) - can be "integrated" or "discrete", more on that below
There are additional things you can purchase, such as a sound card, wireless card, additional hard drives, etc. These won't be covered in this guide.
The first step is to decide what you want to use your PC for. Will you be surfing the Internet and checking emails? Will you be playing the latest PC games? Will you be doing photo or movie editing? A gaming PC will need better components than an Internet PC will, and will cost more.
The most expensive single part of a PC is usually a discrete graphics card. Discrete means separate or detached, and a discrete graphics card is a separate board that is connected to the motherboard. You can forgo buying a graphics card altogether and just select a motherboard with integrated graphics. It is much less expensive, however the graphics processing ability of an integrated GPU is far less, and will only be suitable for web-based and older games, or light photo editing. For an Internet/Email only PC, integrated graphics will be ok.
Compatibility, sockets, interfaces, and standards
This is the part that discourages most newcomers, as there is a plethora of different standards that you will have to mix and match. Stick with it, and you will eventually understand it and have a leg up on all your friends. I will break down each component and give the most common standards used as well as my preference.
Computer case
The most common sizes of cases are "Full Tower", "Mid Tower", "Mini Tower", and "Desktop". Full towers are very tall and usually used for workstations and servers. Mid towers are the most common for home PCs and is what I recommend. Mini towers are smaller and come in many different shapes. Desktops are designed to sit flat on a desk.
Beyond the case size and shape, there are specifications that determine what motherboard and power supply a case will accept. The two main types are "ATX" and "Micro-ATX" (there are others but I recommend staying away from them while you're learning). Micro-ATX is smaller than ATX, and both are very popular. For simplicity I recommend building your first PC in an ATX case. This is because micro-ATX cases sometimes take ATX power supplies, and it can cause problems when ordering the right parts if you aren't on top of it.
Cases generally have USB, Fire-wire, and Audio ports somewhere on or near the front. These are useful, so make sure the case has them in the location you desire. They will be plugged into the motherboard, which I will cover later. Just FYI, the ports on the back of the PC are a part of the motherboard, not the case.
One other thing to consider is that a lot of PC cases come with a power supply. It can be a good way to save a few bucks by buying a case with a PSU already in it, just make sure you get a more expensive case as the cheap power supplies that come in cheap cases can cause instability or damage other components.
Power supply
ATX and Micro-ATX are the two main options here as I mentioned above. Power supplies are the most important component of the PC, as a low quality one can damage your components. Just make sure to stay away from $15-20~ cheap ones, as those are generally low quality. When purchasing a case with PSU or a separate PSU, be sure to read the reviews (depending on where you buy) and if one has too many negative reviews stay away from it. When buying a power supply separate from a case, make sure they are compatible. ATX12V is the latest standard for ATX cases as of this writing.
Motherboard
You've learned about ATX and micro-ATX, which refers to the mounting hole pattern and size of the motherboard. If you're getting an ATX case, you'll need an ATX motherboard. Next make sure the motherboard CPU socket matches the CPU that you want. After that, make sure the motherboard chipset has the features you want. Examining the side of the motherboard that has all the external connectors helps.
Some motherboards will have integrated graphics and others won't. If you're planning to get a discrete GPU, make sure it has a socket that matches your GPU (PCI Express is the most common at the time of this writing). As far as system memory goes, make sure the supported memory (DDR, DDR2, DDR3, DDR4, etc) matches the stick(s) of memory you intend to get.
Processor
The main things to look at in a processor are the number of cores (single-core, dual-core, quad-core, etc) and the CPU speed (measured in MHz, GHz, or THz). Retail CPU's almost always come with a heat sink and fan (HSF). Unless you are buying a high performance heat sink for better cooling, stick with the stock heat sink.
Memory
As mentioned above, make sure you get memory that your motherboard supports. If your motherboard supports dual-channel or tri-channel memory, get a matching memory kit to take advantage of the additional performance.
Hard drive
Hard drives use various interfaces, so make sure your motherboard has the correct connections (PATA, SATA, etc). At the time of this writing, SATA 3.0 is the most common, and SATA 6.0 is up and coming.
Optical drive
You'll generally want a DVD burner, as they are dirt cheap and can read and write both CDs and DVDs. If you want to read or write Bluray discs, you can get a Bluray ROM or burner instead. Just remember that a ROM drive can only read, while a burner can read and write.
Graphics card
This can be the single most expensive part of the PC. If you have decided you need a discrete graphics card, then you have a large range of choices to make. Discrete graphics cards range from $30 up to $700 and higher. Figuring out how much graphics power you need can be difficult, and I can only give a very rough guide here since the market changes constantly as new cards are released several times per year. If you do a bit of movie editing or graphics editing, a $50~ card should be fine. If you want to play the latest games but aren't worried about maxing out settings, a $150-200~ card should be fine. If you want to max the latest games, a $300-400 card should do fine. As far as which graphics card to buy at each price point, I recommend browsing Tom's Hardware, Anandtech, or similar hardware sites and reading their reviews.
Now that you have an idea of what you need and what to look for, it's time to start shopping. I recommend Newegg.com since they have competitive prices, excellent customer service, and their website is very usable. Use the categories to find the parts, it may take some getting used to. Refer to this guide when selecting each component.
Preparation
Now that you've decided on the parts, make sure you have the tools and a clear workspace to work with. A static wristband is a good idea for beginners, which can be purchased at any electronics store or online. The fasteners and other hardware you need (such as cables) should come with your components, as long as you've purchased "Retail" products and not "OEM" products (note: most hard drives at Newegg.com are OEM and that's ok, as the cable to connect them comes with the motherboard).
Putting it together
Once you've got all your new parts in, you'll want to lay them out neatly in your workspace. Before you start opening bags though, go wash your hands. It will discharge any static and clean any corrosive oils off your hands. Follow the directions that came with your anti-static wristband if you bought one of those.
 Step 1
Take your case out and remove the side panels. There are usually between 1 and 3 screws in the back for each side panel, although some use a lever. Pull any hardware or tape out of the inside of the case. Usually there is a small packet with screws/stands, a power cord, and zip ties around the wires of the power supply (if it is included).
 Step 2
Make sure there is a slot for your optical drive that is open in the front (usually the top-most one). If there is not one open, remove the front bezel and then remove one of the 5.25inch drive bay covers. Once you have an open slot for your optical drive, put the front bezel back on.
 Step 3
Install the optical drive by sliding it in from the front of the PC (with the bezel fully attached), then use 4 fine screws (2 on each side) to fasten it in place. Note: some cases have "tool-less" features, which are usually little plastic snaps or sliding pieces that secure the optical drive. If these are available you can use them in place of screws.
Step 4
If you purchased a separate PSU, now is a good time to install the PSU. If the PSU is pre-installed, skip this step. The PSU is held on by 4 coarse screws in the back top of the PC case. These screws should come with the case or PSU. There is only one orientation that it will properly line up, so don't worry about messing it up.
 Step 5
The next step is to install the motherboard. Before this is done, the rear-panel will need to be swapped out. The motherboard comes with a rear panel which you will want to use. Hold that rear panel up to your new motherboard's rear ports and poke out any additional holes from the panel that need to be poked out. Now install it into the case, making sure to remove the one that may have come with the case first. Most usually snap into place, just make sure it is fully seated.
Step 6
Motherboards mount with 6 or more screws. The motherboard in the first picture below (a micro-ATX motherboard I used for my office build) uses 6 screws, and you can see the designated holes as they are outlined by a white circle. The case will have corresponding holes to match these, and may need to have motherboard stands installed, which can be seen in the 2nd photo below. Some cases come with little bumps that stick out about 1/4, in which case the motherboard stands are not needed.
If the case needs motherboard stands, take the motherboard (in its plastic wrap still), set it in place, and eye-ball which holes need to have a stand installed. If you are unsure, refer to the motherboard and case manuals/paperwork. Once you have the motherboard stands installed (tighten them with pliers), or if you didn't need them, carefully remove the motherboard from its plastic wrap or foam (making sure your static wristband is on) and set it in place, then use the provided screws to tighten it down.
 Step 7
Next insert the hard drive into one of the open hard drive internal 3.5-inch bays towards the front of the case. Use 4 coarse screws to secure it in place (2 on each side). In the picture to the right, I have the hard drive installed and have also connected some motherboard headers (explained in the next step). For those that have taken notice, I did install the hard drive into one of the 3.5-inch external floppy drive bays as opposed to one of the internal hard drive bays. This was mostly a preference for this build to keep the wires uncluttered. Note: some cases have "tool-less" features, which are usually little plastic snaps or sliding pieces that secure the hard drive. If these are available you can use them in place of screws.
One other thing to note in the picture is that I removed the rear exhaust fan. For this build, the extra fan is not needed as this computer will generate very little heat (integrated graphics and 45W CPU). I recommend keeping the exhaust fan (if the case came with one) unless you know it won't be needed.
 Step 8.
Now while things are still easy to access you may want to connect the front bezel buttons, USB, Fire-wire ports, audio ports, and speaker. All those wires that were dangling from the front bezel need to get plugged into the proper motherboard ports. Refer to your motherboard manual for help on where they plug in. The plugs are usually labeled for USB, Fire-wire (IEEE-1394), Audio, Power SW (Power Button), Reset SW (Reset Button), HD LED (hard drive activity LED), P LED (computer on LED), and Speaker (makes the beep during boot up). Their exact names vary by case, but are usually self-explanatory.
In the picture to the right you will see I have plugged in the front panel buttons and one USB front panel port. I chose not to connect the front audio connectors as it isn't needed on this build. And there is no Fire-wire support with this motherboard.
It is a good idea to keep wires neat as you build the computer, so I have wire-tied any slack in the wires and tied them out of the way.
Step 9
Now install the CPU. Follow the directions that come with the CPU, as the installation procedure will vary by make and model. There will be a specific orientation that the CPU fits into the socket, so be sure to follow the directions closely. And don't forget to plug in the fan power connector, if the heat sink has a fan.
I have provided pictures of a socket AM2 AMD Sempron install, which uses a lever on the socket and a lever on the heat sink. This may or may not be similar to your motherboard and cpu. One thing to check on all CPU installations is that there is thermal compound on the bottom of the heat sink (the part that contacts the top of the CPU). There should be a patch of compound on all retail heat sinks that come with CPUs; however, in the event there is no compound, you will want to apply some before installing (buy it from Radio Shack or an electronics store).
 Step 10
Now install the memory. Follow the motherboard manual's guide for which slots to install them into. If you purchased a multi-channel kit (dual, tri, etc), make sure you use the right slots. There will be two tabs at each end of each memory slot. Snap them back and insert the memory module (making sure the "cut-out" on the module is aligned properly) and press firmly until the two tabs lock into place. If the ram module doesn't go into place, make sure you aren't attempting to put it in upside-down.
In the picture to the right, I have installed two 1GB memory modules (a dual-channel 2GB kit). They came with shiny chrome heat spreaders. There were only two slots available so there was no guessing as to which slots to put them in. Many motherboards have 3 or 4 memory slots though, which is why you should consult the manual on which ports to use depending on how many modules you have.
 Step 11
If you purchased a discrete graphics card, install it now. Consult the guide to determine what slot to use (PCI Express, etc). Be sure to open up the rear expansion slot cover so the graphics card can fit. In the second picture to the right, I have highlighted in the red the PCI Express X16 slot and also the back panel that needs to be removed. The 1st picture shows a PC with a discrete GPU installed, and a custom heat sink. Once the GPU is in place, use a coarse screw to secure it. Note: some cases have "tool-less" features, which are usually little plastic snaps or sliding pieces that secure the graphics card. If these are available you can use them in place of screws.
On the second picture to the right, you will also see that the motherboard has 4 memory slots, and I have modules installed in the two right ones. On this MB model, it specified to have them either in both right slots or both left slots, to activate dual-channel. Some motherboards have a different configuration.
Step 12
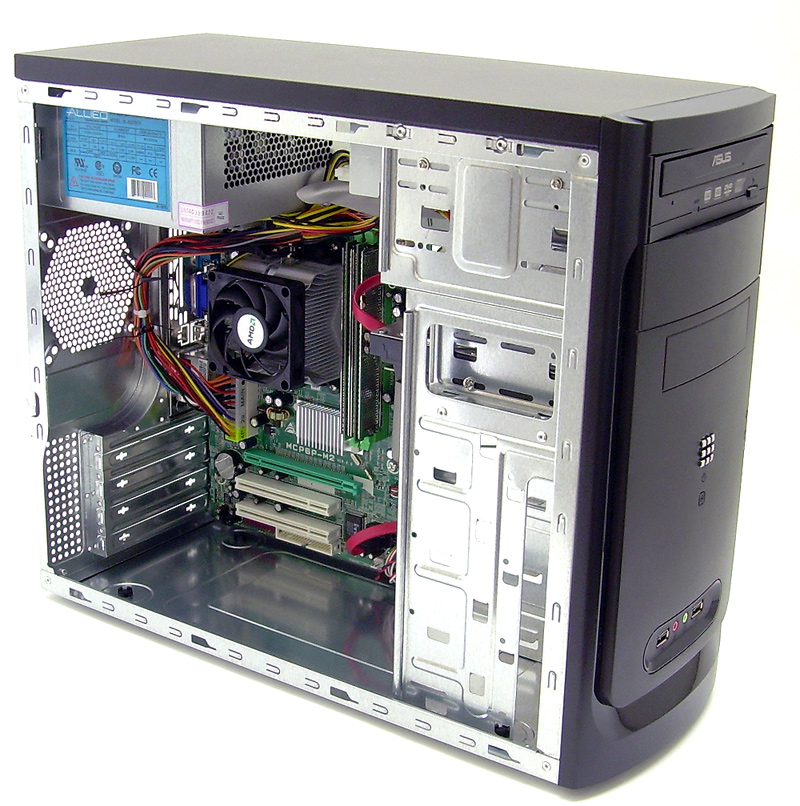
Now it's time to plug everything else in. Plug in the 24-pin motherboard power cable from your PSU into the large motherboard power port, and then the 4 or 8-pin CPU power cable into the motherboard as well. Plug in your optical and hard drive(s) using the proper plug (SATA power cable plugs are long, very flat, and black, and the cables themselves are very small - IDE/PATA power cable plugs are larger with 4 distinct plugs, and the cable is very wide and flat). If you have a discrete graphics card that requires a 6 or 8-pin (or sometimes more) power plug, be sure to plug it in. Plug in all your fans. If the fan has a very small 2, 3, or 4 pin connector, plug it into a free power plug on your motherboard (if available), or use a molex adapter to plug it into the PSU. If they use the larger molex 4-pin connectors only, connect those to your power supply. In this build, I didn't have any other case fans so that wasn't an issue.
You're almost done, if you plugged everything in right, you can move on to the software installation. You may have extra cables and hardware left over, don't worry as that is normal. There is a lot you will not need. I recommend being very neat about routing your wires, in case you need to change anything later.
Troubleshooting
Before you even have the operating system installed, you can test the system to make sure it is working and detecting all of the hardware. Plug the monitor and keyboard in and the power cables, and start it up. Tap the Delete key repeatedly until you are presented with the blue BIOS screen. In the blue BIOS screen you should be able to navigate and find where it shows what hard drives and optical drives are connected. You will likely also be able to detect the system temperatures if the BIOS supports it.
If you pressed the power button and absolutely nothing happened, make sure the switch on the back of the power supply is on "I" and not "O" (which would be off). Then double check to make sure the power cables are connected. If it does not beep and you cannot get into the BIOS, or it beeps twice or has a long beep, you need to go into the Troubleshooting section of your motherboard manual, and see what it says for the beep error code. Usually long beeps are the result of RAM that is faulty or set to a speed that it cannot run at, but that is not always the case. No beeps could mean a bad motherboard, or possible CPU. But again, the beep codes are different for every motherboard so follow the troubleshooting guide in the manual.
What next?
Now it's time to install the operating system, drivers, and other software. That will not be covered in this guide, I recommend Tweakguides tweaking companion to help you with that task; just download the PDF guide and scroll down to the "Installing Windows" menu item and click it.